After searching the web for some recipes and tips, I gave up unsatisfied with what I was finding in cop out faux cheesecake recipes. Deciding this was going to have to be an experimental project, I checked my several cookbooks for a recipe I was willing to use that seemed friendly.
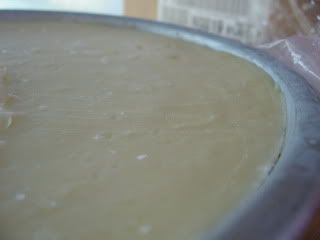
This photo is not of the whole cheesecake, because after it sat in the fridge, I of course had to test taste a slice. It was fabulous.
Oh yes. I did not use a spring-form pan. A) I don't have one. B) They are worthless uni-tasker that leak. No thank you. I actually used some flour based baking spray, and the cheesecake comes out delightfully fine, without trouble. A certain TV chef that my boyfriend is a HUGE fan of recommends lining a round cake pan with parchment paper. I'm lazier than that.
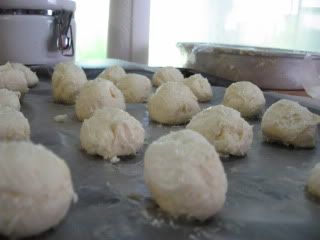
I did not bother making a crust for this cheesecake since I was not going to be eating it in the traditional manner. After attempting to shape a truffle from the chilled concoction, I decided it would be best to freeze it overnight. That was much easier, but the stuff warms fast. I highly recommend that your wear latex gloves, Powder Free, as this gets messy.
These tasty little treats then went back into the freezer to firm up again for the next step. About an hour or so.
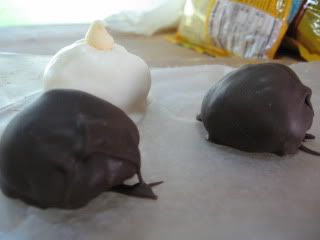
I then melted milk chocolate candy coating in a bowl, over a pot of simmering water. I also melted a bowl of vanilla candy coating. I then rolled each truffle in the coating of my choosing, one at a time, using a spoon to help coat. Then I moved the truffle to a bit of wax paper I had waiting on the side and allowed the candy coating to harden over the truffle. If you so choose, you should add your desired flourish of a chocolate chip or candy while the coating is still soft.
I of course subjected my boyfriend and his father to awful task of guinea pig duty. Oh, the poor dears....
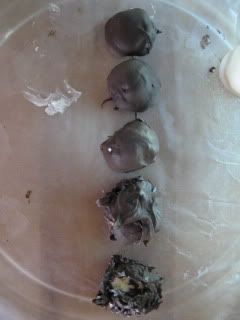
A word of caution. Here in western Washington, it is quite humid. When we get scorching hot days, like the day I was doing these truffles, it's still very humid. I found out quickly that high humidity in the air will quickly seize your melted chocolate. In fact, here's a small demonstration of what I mean.
~~~~~~~~~~~~~~~~~~~~~~~~~~~~~~~~~~~~
Okay, the recipe I used... (Ahem, courtesy of Alton Brown, the aforementioned TV chef.)
Sour Cream Cheesecake
12Servings
*Note: I am going to give you the recipe as written in the book that I used, but just the filling. If you are somebody who might be holding a truly American ideal and have some insane desire to sue me for posting this, just shoot me a message, and I'll remove it. Don't get your panties in a bunch.*
Food Network Recipe--------The Book
20oz Cream Cheese---------24oz Cream Cheese (room temp)
1 1/4 cups sour cream---------10 1/2oz sour cream (room temp)
1 cup Sugar--------8oz Sugar
1Tblspn Vanilla-------1Tblspn Vanilla
2 eggs--------2 eggs
3 egg yolks----------3 egg yolks
1/3 cup heavy cream---------1/3 cup heavy cream
Preheat oven to 250F degrees. (Unless you are doing this in a crust, 300F for baking the crust before hand, and dropping to 250F before baking cheesecake.)
-Bring 2qts water to a boil.
-Combine vanilla, eggs, yolks, and cream in a small bowl and set aside.
-Using a stand mixer with paddle attachment , beat the cream cheese with the sugar for 1 minute on low speed. Scrape down the bowl, add the sour cream, and mix on low for 30seconds. Scrape the bowl again, boost the speed to medium, and beat until lump free. About 2 to 3 minutes.
-With mixer running, slowly pour in the egg mixture, stopping every now and then to scrape down the bowl. When the mixture is homogeneous (Do you know your 8th grade science terms? AB's editors don't know the difference with it between homogenous.), pour the filling into the cooled crust. (Or, if you're making truffles, into a prepared pan.)
-Center a roasting pan in the oven and line it with a kitchen towel. (AB says this is to help slow the march of heat into the bottom of the pan.) Place the cheesecake in the middle of the pan and add the boiling water to 1.5 inches up the side of the pan.
-Bake for 2 hours, then kill the heat. (Turn off the oven. I know you're smart.) Open the oven door for 1 minute, then close it and leave it closed for 1.5hrs. (With the cheesecake still inside, folks.)
-Remove the cheesecake from the water bath and refrigerate for 6 hours before serving. Let the water bath cool completely before removing from oven. (Read: Remove cheesecake while roasting pan is still on oven rack. Otherwise, you are going to splash water onto your lovely cheesecake, or yourself.)
~~~~~~~~~~~~~~~~~~~~~~~~~~~~~~~~~~~~~~~~~~~~~~~
Now then, just follow my steps as listed above in the area I posted pictures, and you too can have delicious waist expanding confections of awesome!


No comments:
Post a Comment